Showing posts with label home made. Show all posts

Wednesday, January 12, 2011

Sew Cheap!

I've once again dragged out the sewing machines in the name of 'upcycling'.
After much hinting, harassment and outright threats my mother FINALLY cleared out the ten-years-worth-of-crap that was clogging up her wardrobe leaving me with a veritable gold mine of material in the form of old clothes. After I dragged them all downstairs I decided it was time to hit that towering 'clothes-to-refashion' pile. Waste not, want not! :)


These shorts came from an old pair of jeans with various scrappy odds and ends making up the appliqued tree on the leg. The top is actually for Indi and was made from an old singlet top of my sisters. I'm incredibly impatient and lazy so I made the whole lot on the overlocker, except for the stitching around the applique.

These shorts were once a button-up shirt belonging to my brother. I actually stuffed them up a bit making them too low-rise but my good friend Karisma suggested just taking the waistband off and replacing it with a thick band of ribbing. Great idea me thinks! They are really light and cool so I think with a soft ribbed waist they'll make great pyjama pants. The top was an old white t-shirt. Again, all on the overlocker. Even the neck hole and arm holes have a rolled edge to save me having to concentrate too much in sewing a proper hem!

These shorts were a pair of women's stretchy brown pants. The singlet is a combination of a long-sleeved top, a couple of old sheets and a scrap of brown corduroy I found in the remnants bin at Spotlight  a few months ago (ok, so this one isn't ENTIRELY recycled ;)). I love love love the way it turned out!

Gratuitous 'gorgeous baby' shot ;)  

Tuesday, July 6, 2010

SO ... A Needle Pulling Thread

Who remembers "The Sound of Music"?
I do. Well, it's kinda hard to forget when your partner sticks it in the VCR player every chance he gets, and when a certain Facebook friend (who no doubt has seen the movie twice as many times as I have ;-)) keeps posting random quotes and song lines on my wall!
Anyway, it appears that the frugal spirits of Fraulein Maria her curtain-come-lederhosen-clad charges have infiltrated my psyche because I just made a pair of pants out of a tablecloth.

LOL! Ok wait ... let me explain.
Lately I've been tinkering about a bit with the sewing machine. I've never been very good at sewing (too impatient I think) but I found some pretty easy sewing projects online and thought I'd give them a go. After a few stuff ups, I've managed to produce a heap of pants and a t-shirt for Keanu and a tiered skirt for Indi, all made from recycled clothing; old shirts, dresses, pants and the likes.

Somehow, in a haze of google searches, I came upon this pattern. How cool are they! (and heaps of good sewing tips too.) Suddenly I remembered a gorgeous piece of batik print fabric that my sister bought back from Bali last year. It would be perfect for this pattern! But I don't want to stuff it up; the piece isn't very big. One wrong run through the overlocker and all would be lost.

Hmmm ... need to make a test pair. But what to use?
I could go to Spotlight and grab a few metres of cheap cotton OR I could be my usual impatient tightarse creative frugal-minded self and raid the linen closet. I chose plan B ;-) I couldn't use an old sheet, because that would be cutting into my crocheting stash (remember the mermaid and the bag?) but digging deep I found this old tablecloth that I picked up in a second hand store years ago. We haven't bothered with tablecloths since the kids started eating at the table so I figured it wouldn't be missed.

Turns out that the claim is true ... these really are SIMPLE and COMFY pants. I made them without one mistake! You can see that I've changed them a bit around the waist; I've sort of accentuated the front tie and hidden the back one (which is just bias tape because it was all I had lying around).

And I'm wearing them backwards. They sit better on me that way.

All in all, I'm REALLY happy with them. Not particularly good for winter; I probably wouldn't wear them high on a hill with a lonely goat herd and they'd be no good to Climb Evr'y Mountain ...
but I Have Confidence that they will become one of My Favourite Things ...


So Long, Farewell!


Sunday, July 4, 2010

Winter Crochet

Howdy y'all!

Haven't been around here much lately have I? I'm still hibernating :) It's been soo cold here and we haven't been doing a whole lot other than snuggling under the doona until late in the morning and lazing around in the warm winter sunshine when it's about.
But it is great weather for crocheting, so I thought I'd return to blog land with my latest warm creations.

I decided to crack into some of the wool I got for my birthday. This stuff came from my friend Cords. It's a blend of wool, soya and acrylic and is so delightfully soft!
This is great wool to work with when you have kids around; it has a boucle-type texture and is very forgiving if you miss a stitch here or there because of pint-sized distractions ;)

So far I've made a beanie for Keanu and (finally) a pair of fingerless gloves/wrist warmers.


Hooray! No more frozen wrists from resting on the computer!


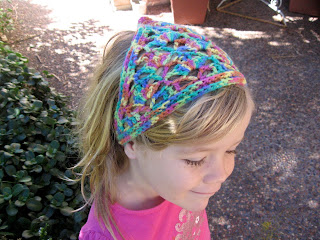
I've still got a couple of balls left ... any suggestions? Maybe a cool dread-headband???


Wednesday, June 16, 2010

Solstice Lanterns

Next monday is the Winter Solstice in the Southern Hemisphere. For those who don't know, the Winter Solstice marks midwinter; the shortest day and longest night of the year.
From a Pagan viewpoint, the Winter Solstice represents the rebirth of the Lord, the Sun, in the eternal cycle. It signifies the end of the darkness, as the days slowly but surely get longer and life returns as the Earth once again is warmed.

Of all the things I miss about living on the North Coast, I think the Winter Solstice Lantern Parade rates the highest. Every year on the Solstice we would line the streets of Lismore to watch the beautiful spectacle parade down the main streets. The whole community was involved; school kids, local charities, groups and businesses. Everyone carried a lantern, ranging from small triangular lanterns decorated by little school kids, to huge dragons and Unicorns and earth mothers, some taking three or four people to carry them! The groups would be interspersed with different bands and musicians creating a celebratory atmosphere.
We'd follow the procession down through the town to the river, where a spectacular firey finale would await. Indi was only a baby the first time we went, but I still remember that awe-filled look in her eyes at the fireworks. Once the smoke had cleared, everyone strolled back into town to celebrate with a street party with market stalls, food, street entertainers and of course music!

So, in leiu of such a warming event, I've decided to create some little lanterns of our own to welcome the return of the sun.
I've used the Star Lantern Tutorial from CHILDHOOD MAGIC to create these lanterns (thankyou Ariella!)


First we painted the circles. We just used cheapo water paints.


Here are the finished designs. I painted both sides of mine (the red spiral one and the central sun/flower one), but Indi only painted one side of hers (the rainbow serpent-looking one). She decided that catching lizards basking in the winter sun was more exciting than painting!


Once the paint was dry, we painted the paper with olive oil to make it translucent. I did this on newspaper to minimise mess. We painted both sides of the circles (ideally, we'd have sourced some proper translucent paper, but what can I say ... I'm disorganised, a cheapskate, and I like a challenge!)


Blot off the excess oil as best you can, then hang them somewhere inside to dry a bit.


Once they are dry(-ish) it is time to fold! The actual folding part was bit tricky for Indi (almost 5), but she enjoyed watching. She took the job of cutting the edges off the circle to make it an octagon.


About halfway through. I can appreciate how origami is such an addictive pastime :)  


And here is the end result!


I have to get some electric candles to light them up for our weekend solstice celebration; real candles will be too dangerous considering that they are paper soaked in oil!
BUT I'm terribly impatient and just couldn't wait to see what they'd look like lit up ...
So I snuck outside with a candle and the camera while the kids were playing with Craig ...


Beautiful, don't you think?

Friday, June 4, 2010

Salt Dough

Another rainy day... another day of inside play.

Today we made some salt dough figurines. Here's how we did it ...

One cup of salt

Two cups of plain flour

Mix them together in a bowl

Add one cup of water, a little at a time, and mix with a knife until it's workable enough to knead. Knead the dough until it is smooth and consistent.

Create!

The best thing about this craft is that Keanu could join in too. Indi always wants to do things that are a bit above Keanu's capabilities, so it's nice to find something that we could all enjoy. 

Here are our final designs ...

Indi made the horse herself and we made the mermaid together. We used the garlic crusher to make the hair and mane. The other one is a 'cookie' with sprinkles on top.

We baked them in the oven at about 100 degrees Celcius. They took 2 hours! I don't think the cookie is even hard through to the middle. Next time we might have to make them a bit thinner!


We did plan on painting them this afternoon when Keanu was asleep, but I guess it was just too much excitement for Miss Indi, because she has slept all afternoon too!

Thursday, June 3, 2010

Crocheted Bag

Here is my first 'Ravelry' project.

I bought this cotton from Spotlight on clearance. I'm not really fond of the colour, but for less than $1 a ball I couldn't very well leave it there!
I stuffed up on the straps too; one of them is twisted! I suppose you have to expect these things when the majority of your crocheting is done one-handed with a squirming baby breastfeeding on your lap.

Now, on to some of that marvellous wool I got for my birthday ...

Monday, May 24, 2010

Crocheted Hat For Indi

She has been interested in witchy-type things lately, which I took as a good excuse to make another funky design with the rainbow wool ... ;-)

She tied the spider on herself... 

... which was promptly pulled off by Keanu! 


Friday, May 21, 2010

Dog Poo, Worms, and a Mexican Walking Fish

We recently acquired a Mexican Walking Fish named 'Nim' along with a fabulous tank, courtesy of Karisma (who most of you probably know from here). I've set the tank up in the kids' playroom; a great executive decision on my part, as I often find Keanu pressed up against the tank mesmerised by the little albino amphibian ...

Anywho, I digress. Nim came to us with the specific instruction that he only eats fresh food ie. worms. Being that my daughter is something of a bug fanatic, Aunty Karisma thought it perfect that Nim should come to live with us! So after about a week of plucking juicy big worms out of the garden I suddenly remembered about my worm farm!

About 18 months ago, I started an experimental worm farm to dispose of the dog poop. At the time we had four dogs and in a suburban backyard the poop was getting to be something of a problem. I didn't want to bag it in plastic and put it in the bin -- that, to me, is just the same as using 'disposable' nappies. I didn't want to compost it either, as we use the compost on edible crops and dog poop can carry all sorts of bacterial nasties that can be easily transferred to humans. After a bit of searching I deduced that worms could be used to compost poop ... so long as that's all they were fed (i.e. you can't feed them poop and vege scraps at the same time). So armed with a box of worms, a couple of styrafoam containers and a whole load of doggy doo I set up a little farm.
It started out veeeeery slowly; a few months in there seemed to be very little action. The poop didn't seem to be getting touched, and the worms didn't seem to be multiplying. The box got shoved in the back corner where it is nice and shady and that's where it stayed, full of poo, all but forgotten until we had to replace the fence. This meant that we had to clear up all the crap that had accumulated in those little-used corners of the yard. My brother and I went down to start moving it all, when he asked what to do with the styrofoam box.

'Chuck it' I said. 'It's full of dog poo; a failed experiment.'

'Are you sure? It doesn't look like dog poo ... it looks like pretty good soil.'

'What?'

Sure enough, there was little dog poo left in there and, when we turned it over a bit (with a shovel of course!) we found it to be FULL of big fat wriggly red worms!
So not-so-failed after all. We moved it out of the way with plans of extending it but again it kinda fell by the wayside. Until Nim came along ...

We trudged down to the back garden, wrestled with the grass (which is still threatening to strangle us even with this colder weather ... we have the greenest backyard in the suburb!) and found the styrafoam box ...

A thorough dig turned up absolutely no worms at all :( I guess they all left to find greener pastures -- or should that be browner pastures? He he he!
In their wake though is a box chocka block full of glorious dark worm castings ...

So this weekend I'm going to go buy another box of worms. I found a few more styrafoam boxes when we cleaned out the garage last weekend. We only have two dogs now, but that is still more poo than I'd like to be dodging when I go out the back! Once it's established again, we'll have an environmentally friendly way of disposing of dog poo which in turn provides a source of food for Nim who in turn provides nice fishy water that I can use on the garden!
Ahhhh ... biodiversity!

Thursday, May 20, 2010

Homemade Laundry Detergent

A few days of cold cold rainy weather has seen me spend most of my time in the laundry; washing, ironing, hanging, airing, everything possible to avoid using the money-sucking dryer (I weakened and used it twice in 7 loads of washing.)
So on that note, I thought I might share my laundry detergent recipe.

It's really easy to make, fairly good for the environment (well, at least better than the over-fragranced-shop-bought ones) and best of all it's CHEAP! It costs bugger-all to make 10 litres. And yes, as far as I'm concerned bugger-all is a standardised unit of measurement ;) .
Most people probably know how to make it; it's a fairly common concoction but for those who don't and are interested, here it is.


What you need is:
1 cup of soap flakes. I use the cheapy homebrand laundry soap and either grate it or grind it up in the blender.
1/2 cup of washing soda
A good swig of essential oil. I use eucalyptus.
About 10 litres of water.

So first, I chuck the soap flakes in a saucepan with about 1.5 litres of water, whack it on the stove over low heat and stir it gently until the soap flakes completely dissolve.


Once the soap flakes have dissolved completely, add the washing soda. Stir it around for a bit; it should start to thicken up. Once they have dissolved, I add the essential oil. Stir it around for a bit longer, until it is all combined and smelling lovely ...


Then tip it into a big bucket and make it up to about 10 litres with hot tapwater. Stir it around a bit more until it's all mixed properly.


When it's cool enough you can pour it into bottles. I use old juice and milk bottles. Sometimes, if I'm feeling lazy, I just leave it in the bucket and scoop it out of there.
Once it cools it will solidify a bit. If you tip it into bottles, leave a bit of 'shaking room' or else it will come out like slugde.

I use about a half cup per load in the top loader. I only used half that amount in the front loader. It doesn't foam up like store-bought detergents, but it does the job for me ;)


Tuesday, May 11, 2010

And Some Rainbow Crochet For My Girl


Monday, May 10, 2010

Warm Little Hands

We are certainly starting to feel the chilly breath of winter around here of late, so I have been jumping back into the winter crochet.


Friday, April 23, 2010

Here she is

I have a real aversion to crappy plastic playthings. I find myself leaning more and more toward simple, imagination-inspiring toys for my kids. Unfortunately, such toys don't come cheap :( so I decided to make my own ...

 
My beautiful crocheted mermaid. I'm very proud of this one!


Indica Rose has been running away to play with her every chance she get's so she has taken a while to finish, but the end result was worth it ...

The look on Indi's face when I said 'she's finished!'

Sunday, February 14, 2010

Some beachy crochet

A little beach bag, just big enough for the car keys and a good book. This is crocheted from old bed sheets torn into strips. 

 
Some barefoot sandals ... these are quite beachy too, don't you think? I've already got an order for another pair!